Showing posts with label Projects. Show all posts

Wednesday, September 10, 2014

Annie's felt play laptop


Hello again! I took the summer off blogging since spending time in front of the computer seemed like a poor option when the weather was so beautiful and the daylight hours so long. We had a full summer, brimming with travels to see family all over the place, rest from Collin's exhausting first year teaching, and a filled with a profusion of projects. We put in a garden and fixed up all the landscaping beds around the house. We gave the kitchen a complete face lift, with new paint for the walls, cabinets, and new shelves for the walls. We finally unpacked our bedroom and bought a bed frame so it looks like we actually live here and aren't just camping out. And we knocked an abundance of small projects from my list, which made me very happy and ready to start another busy semester. Many of these projects I'd like to write about on this blog as I have time,
but now we're back to the school semester and I'd like to finish up our preschool post series.

Before we get back to the quiet book, however, I wanted to show you a little related project I made for Annie's birthday this week.


A number of months ago I ran across this felt laptop tutorial on Kiki Creates. Annie was looking over my shoulder, and was completely taken with it. "Will you make me one of those for my birthday?" she asked then, and many times in the following weeks. When Annie gets an idea, she doesn't let it go. I told her I couldn't make any promises, but I'd see what I could do.


The first thing I had to find were the rub-on letters the tutorial suggested for the computer keys. I loved the professional polish they gave the final product, but since we don't have any craft stores in town it took a bit of tracking down to locate. Finally I found them in a Hobby Lobby when we were on one of our summer trips, in the fine arts section near the stencils. We picked the 1/4" letters in Helvetica as the best font for the job.

Transferring the letters to the felt keys was more difficult than I'd hoped, but in the end I got it done. The keys are 1/2" squares of basic white craft felt strengthened by a bit of interfacing. I "basted" the letters onto the keys with the tip of a paintbrush, and then rubbed and rubbed and rubbed with the slightly rounded back end of a cheap ballpoint pin. When the letters were completely transferred, I removed the plastic film they'd previously been stuck to very carefully, checking to make sure I didn't tear the letters as I did so.


After I had all my keys made, I sprayed them with clear enamel. This in turn created a whole new set of problems, as with the first blast of air from the enamel I sent tiny felt pieces flying all over my back deck and into my flower beds! Then the clear coat completely dissolved the styrofoam plates I'd been using to hold the keys as I sprayed them. After retrieving all the keys and making some new ones to replace the lost or ruined ones, I sprayed them in small batches, using a piece of parchment paper as backing. This worked beautifully, and the letters all peeled up perfectly after drying.

With the clear coat, the rub-on letters are protected from being scratched off, and the computer keys are stiffened so that they feel more like a real keyboard. Even if just for protecting the letters, I wouldn't skip this step, despite any possible frustration.


With all my letters ready and dry, I cut my gray rectangles for the keyboard and screen (5x7") and laid out the keys until I came to an arrangement that I was satisfied with. Then I glued the keys to the keyboard with tacky glue, going line by line and using a ruler to try and keep the keys as straight as I could. Once I had all the keys, touch pad and buttons glued in place, I covered it with a piece of parchment paper and pressed it under a couple heavy books to dry overnight.

The next day I stitched all the keys in place. A glue gun probably would have held the keys in place as the original tutorial suggests, but I wanted the added security as well as the neatness of actually sewing all the keys down. It took a long time and my foot got a cramp in it from all the times of pressing, releasing, and pivoting every five stitches! I sure celebrated when I finished and sewed the keyboard and screen down to the blue inner felt.


Between the top layer of fuschia felt and blue lining felt is a sheet of fuschia-colored extra thick stiff felt. When I went to Jo-Ann's to buy felt for this project they only had three colors of stiff felt in stock - white, black, and fuschia - so it made my color decision easier. I cut the stiff felt to the same width as the top and bottom layers, but each piece a quarter inch shy of half the length so that when put together they left a 1/2" gap in the center of the laptop for folding. In other words, for my laptop that is 8" by 6" when folded, I cut the stiff felt into two pieces each 8" by 5.75".


At this point, I also sewed the nameplate to the laptop "lid", the button to both layers of fuschia felt, and the button strap just to the bottom edge of the inner stiff felt. I was trying to minimize seams that would show on either outer layer to keep the look clean.


When everything was ready, I stacked the layers all together and stitched around all the sides with a 1/8" seam allowance to hold it all together. Then I stitched a straight line down the center for the fold. I sewed on the side supports that keep the lid up, just like in the original tutorial, trimmed up a few loose threads, and I was finished!


 Annie's laptop is quite a lot smaller and cuter than mine. I purposely left the screen blank so that she could imagine what she's doing with it, whether writing a story, looking at pictures, or playing a game. It also works as a very small flannelgraph, so we might do something with that in the future.


I'm interested to see how exactly Annie is going to use this in play. Yesterday I saw her staring at the blank screen and looking very absorbed, and she told me she was watching a funny video on it. I didn't ask if there were any cats in the video. Sometimes kids are a scary mirror.


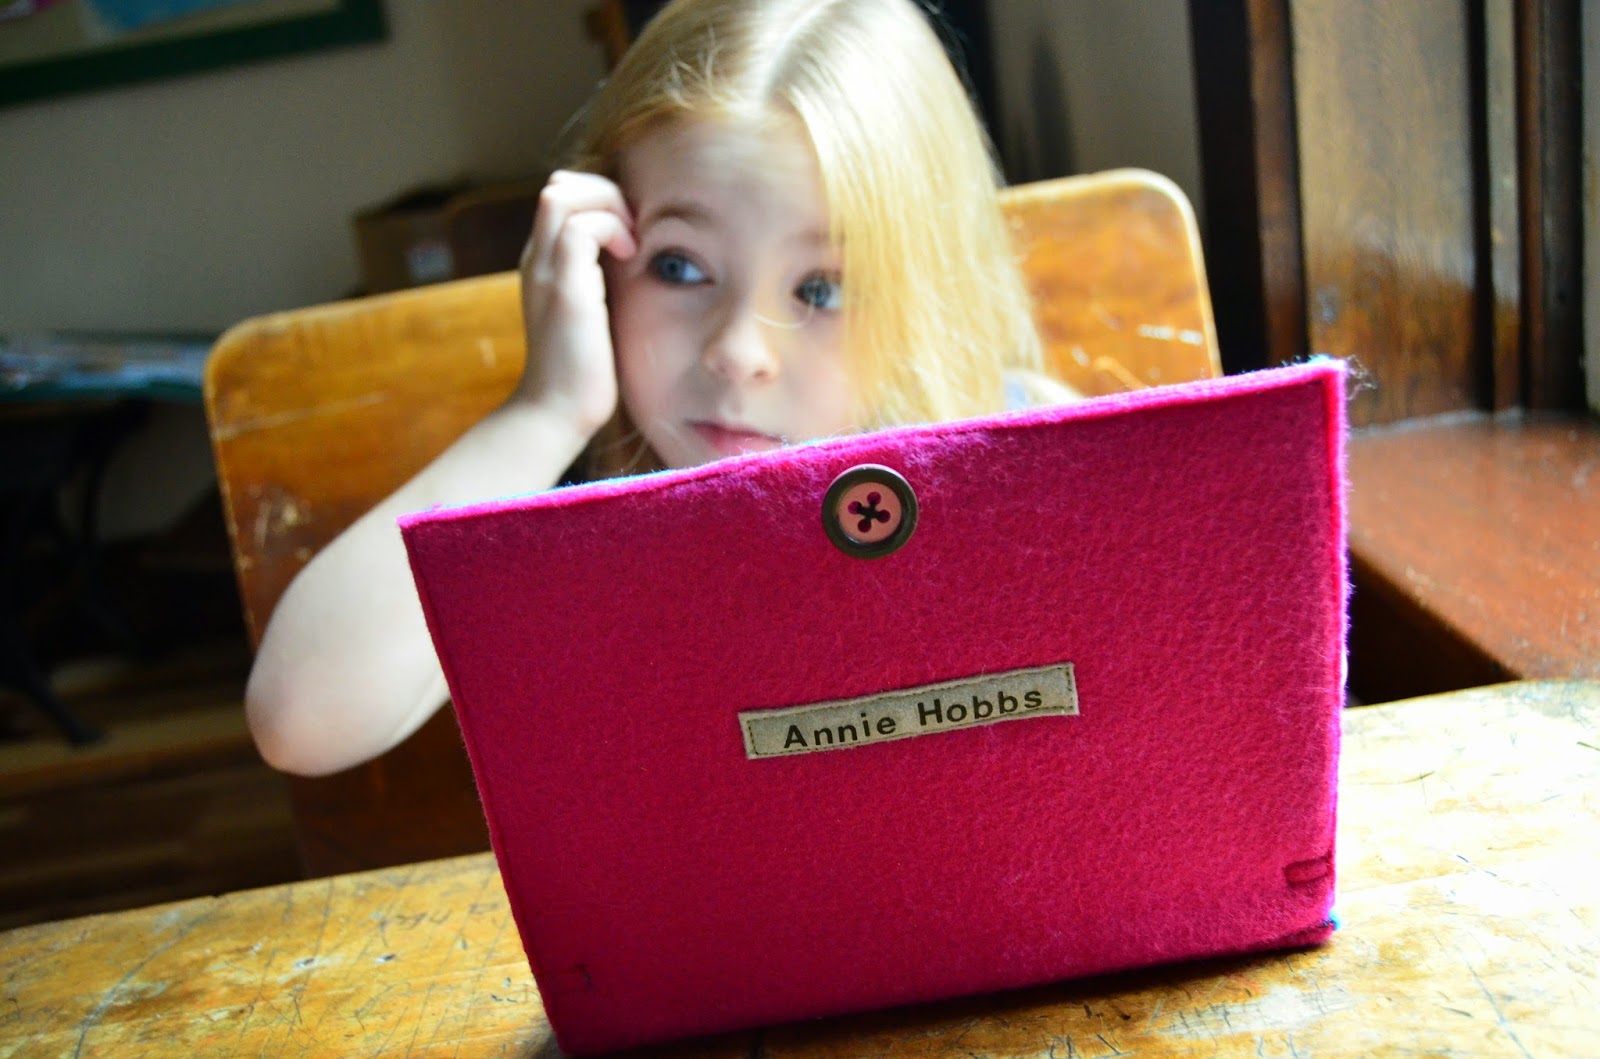
 On the other hand, this is more how I was hoping the computer might inspire her. I think in this picture Annie is trying to compose The Great American Novel, but got a case of writer's block.


Problem solved! On with the story!

Thursday, March 06, 2014

The story of a little couch


Last week I was visiting my family in Bloomington, and while I was out shopping with my sister, I came across a little loveseat at the Habitat ReStore. The couch needed some love. Actually, it needed reupholstery. It had small stains all over it, and a whopper of a stain all over the back. But it didn't smell at all, it more or less matched the style of our other living room furniture, and it was marked down to $33. After spending a long while conferring with my sister, random shoppers, and finally my dad on whether or not I'd be able to bring it home on the roof of our station wagon, I bought the couch.


After my dad tied the couch to the roof of our car, I drove it (and my girls) the three hours north back to our home. I don't like Interstate driving anyway, but doing it at night, with my littlest baby crying because she hates her carseat, and my biggest girl wailing, "Mama, Jenny's crying! Make her stop!", and with a couch tied to the roof was kind of nerve wracking. All I could do was imagine the disaster that would ensue if the couch flew off the roof and hit a car behind us. I pulled off a few times on the drive up, both to calm the crying girls and to check on the couch, and it remained securely tied on. Somehow, despite all of that, we made it home, with the couch intact.


Of course, as soon as we got it in our living room, it was obvious that something had to happen to the aesthetics of the couch if we were going to coexist peacefully with it. I should back up here and say that even when I bought it, I wasn't planning on it staying in our house for long. We have a fainting couch about the same size that we're eventually going to put our living room, but it's about halfway through being reupholstered itself. Realistically, we know we're not going to be able to finish it until sometime this summer. But we desperately needed more seating, since we are hosting a regular evening class in our home for some of Collin's students to come hear from guest speakers in various professional fields. Our first meeting had students sitting on the floor or in child-sized chairs, and that wasn't very hospitable. Thus, the $33 temporary couch.


The first day the couch was in our house, I spent a lot of time staring at it. What could we do to make it fit in, and to enjoy the months we had to live together? Most of that day, I researched and very seriously considered several methods of painting it. I learned a lot in my research, and also discovered that our couch was a pretty good candidate for paint. I envisioned a gorgeous plum colored loveseat, maybe even with golden yellow trim, to cover over the poorly painted navy blue wooden trim.

In the end, however, I ran the numbers and realized that it was going to cost at least $50 and a weekend of warm weather to do the job properly, and that was in the best case scenario. For the same price, I could buy a beautiful Indian throw blanket (already something I was hoping to get for our living room), use it as a cover for the couch while we keep it and then have a lovely throw blanket for after we get rid of the couch. And so, I present to you:

The Easiest Couch Makeover Ever


Ta-Da!


I know, throwing a blanket over the couch isn't really a DIY project to brag about, but oh my goodness, I just love it. And this isn't just any blanket. It is called a kantha quilt, which is a traditional Indian blanket made of piecing together used saris together, and quilting the stacked layers with long running stitches across the entire blanket. I've wanted something like this for a long while, to add some bohemian flavor to our living room and keep the antique look of our other furniture and house from becoming stuffy and non-kid friendly.


Picking out a kantha quilt to order was the hardest part of this whole "project". There are so many gorgeous ones, and Collin and I each had different favorites. We picked out this one because it had lots of jewel-tone fabrics that go well with our other throw pillows and the stained glass windows in our living room.


I was a little nervous ordering from this shop because it is brand new and I was the second-ever sale. But they had the prettiest kantha quilt I'd seen, so I went for it and hoped for the best. Not only did it ship exactly when it said it would, but it made it from Jaipur, India to our little town in Indiana in 48 hours. That is simply amazing to me! Everything must have lined up just perfectly, because the package arrived 25 hours even before FedEx expected to deliver it. In fact, this morning just as I was sitting down to check the tracking number, my doorbell rang with the delivery.

I spent longer dancing happily around the living room exclaiming, "It's so beautiful" along with my girls than I spent fixing up the couch, which was just how I wanted it to be. With a house full of half-finished projects, it was so nice to keep one very simple.

But, does it pass the final requirement? Is it cozy enough to invite girls to snuggle in and read books?


Oh yes.

Thursday, February 20, 2014

Hair Bow Organization


To go along with our H is for Hair quiet book page, today I have a quick organizational project to share with you! My girls (like most little girls, I expect) have a fairly large number of hair accessories. They have a few headbands, a large handful of elastics, but what really started accumulating were barrettes, clips, and bows. They are all super cute, but without a good way to organize them they ended up jumbled in a battered ziplock bag, and we rarely went to the trouble of rummaging through the clutter to pick out the right accessories.


One day after Christmas I was organizing and cleaning in the girls' room, putting away their new hair bows from Christmas, and decided it was time to do something. Taking a cue from the ribbon organization in our quiet book page, I decided to frame vertical stripes of ribbon on which I could clip the hair bows. That way they would all be visible, and the color would add some fun girliness to the room. A quick search on Pinterest showed that my idea was far from unique, but I did independently come up with it. If so many people came up with the same idea, it probably has some merit!


First I bought a $2 frame from Goodwill, removed the glass and the faded print inside, and spray painted the frame white. Actually, Collin spray painted it for me one afternoon, since he could take it to a place with better ventilation. Painting in the winter is the only time I really wish we had a garage.


Then I covered the matting and cardboard back with a natural-colored fabric, similar to burlap but with a finer-weave. I just smoothed the fabric over the board and fixed it with packing tape. So, so easy. Then I cut five pieces of white grosgrain ribbon , spaced them evenly, taped them to the back and added a couple of staples to the edges to make it extra secure. I had to discipline myself to make such a neutral colored project, remembering that the color of the hair bows was the focal point, not the pretty fabric, ribbon, or frame.


Then we nailed the ribbon board back into the frame, clipped on all the hair bows, and it was finished! This was seriously one of the fastest projects I've done in a long time. It took probably about two and a half hours, including painting and hanging up - although that doesn't count the time the frame took drying overnight. Still, nearly instant-gratification for a DIY project - and so pretty and useful!

Tuesday, January 28, 2014

Perpetual Calendar Makeover

I have all sorts of good intentions to blog more frequently, but I'm having a little trouble making good on them. A large reason for that is that my laptop died over Christmas, so I am working on my very old and v.e.r.y. s.l.o.w. little netbook that Collin kept for recording research out in the field. All my rescued files, including quiet book photos, are on an external hard drive, and it's a huge hassle to try to pull together blog posts in this situation. I hope before too long I'll be able to get back to a regular schedule, but in the mean time, here's a fun little project I finished a week ago.


I found this perpetual calendar at a thrift store for two dollars, and knew right away that it would be a fun addition to the school room. I remember exactly the day I bought it - it was November 1st. It's easy to remember, because the two tiles that were missing were October and 31. Since the calendar was set up for November, I wondered if the store volunteers had just set the calendar out that morning, or what the story was. Anyway, for $2 I figured I could probably figure out something that would work.

For two months it hung in our school room, looking kind of sad and dated, but full of potential. Finally, I decided to take the plunge and give it a makeover. I'm so glad I did - check out how it looks now:


How do you update a vintage wooden calendar? You put a bird on it! The whole makeover was surprisingly easy. Collin cut me eight new square tiles for holidays and the missing 31, as well as a piece for the decorative picture holding slot. I cut the bird picture out of a calendar from last year. The flip side of the picture board has another picture from the calendar - a large colorful butterfly - but the bird side turned out better so it will likely just stay that way.


I refreshed the grimy beige tiles by printing new dates onto white cardstock, gluing the cardstock squares to the wooden tiles with tacky glue, and spraying them with Rust-Oleum Crystal Clear Enamel. If I were to do it again, I think I would use rubber cement to secure the cardstock to the wooden tiles, since the tacky glue doesn't clean off the paper if you get an accidental smear on it. The clear gloss coat was the trickiest part of the project, since we don't have a garage and it's far too cold to spray outside. I ended up spraying them inside and smelling the fumes throughout the downstairs all night, which isn't really something I recommend. Spray paint projects really do belong to the summer.

The longest part of this project was deciding which holidays to include and finding little icons to represent each day. I began by listing all the holidays I wanted to include, and dividing them by whether they fell on the same date every year or moved around. Holidays with fixed dates get a holiday icon fixed to the back of the  date tile, so when their month comes around I only have to flip the tile over to display the holiday instead of the date. I was surprised that the only duplicate holiday date was February 14 (Valentine's Day) and June 14 (our anniversary). Happily, those can both be very well represented with a heart! 

The other holidays I included were:
1 January: New Year's Day
2 February: Groundhog's Day
4 July: Independence Day
6 January: Epiphany
8 September: Annie's birthday. So far September is the only month of the year we have two birthdays in our family, and since the 8th isn't another holiday Annie gets to have her birthday permanently on the back of the 8 tile.
12 February: Lincoln's birthday. Instead of President's Day, a moveable holiday, I decided to put both Lincoln's and Washington's birthdays on their actual days, and then to figure out Presiden'ts day from there. I did this both because I didn't really want to dedicate one of my moveable tiles to President's Day, and because Holiday Inn was on my mind as I made this calendar and in that movie both Lincoln's and Washington's birthdays are celebrated, as in the old style before the two holidays got smashed together.
14 February and 14 June: Valentine's day and our wedding anniversary. Also Flag Day, but our anniversary trumped that holiday.
17 March: St. Patrick's Day
22 February: Washington's Birthday. President's Day is always the third Monday in February, which I think is also the Monday in between Lincoln's and Washington's birthdays.
25 December: Christmas!
31 October: Halloween.

The moveable holidays I included are: Good Friday, Easter, Pentecost, Thanksgiving, Daylight savings both spring and fall, Mother's Day, Father's Day, Back to School, School holiday, Birthday, Season changing (for all exuinox and solstice dates), an American flag for Memorial Day, Veteran's Day, Pearl Harbor Day, or any other time we're feeling patriotic, and Labor Day. I realize I had to leave out a number including Martin Luther King Jr. Day, Columbus Day, and National Cheese Appreciation Day, but I'm pretty happy with the list.


I painted the calendar with bright cherry red latex enamel paint. I didn't prime it so it wouldn't be quite as intense as if I was painting on top of white, and the color is just about perfect. Before painting, I traced over the days of the week with a ball point pen to create enough indentation in the wood that I could paint new letters on top. It worked pretty well, especially together with the fact that the original letters showed through the fresh paint a tiny bit. 

I painted the letters back on with white fingernail polish. It worked really well, except I was a little impatient and painted before the red was fully cured. The white mixed with the red just enough to make the pink noticeable against the fresh white paper of the tiles. Oh well.


And just for fun, here's a before and after comparison photo. Granted, I snapped the first picture at night, so the colors are off a bit, but the dinginess is pretty accurate. You'll notice that I took down the extra month tiles and replaced them with new holiday squares. That's because the months are narrower than the date tiles, and prone to falling off at the slightest bump. That's why they were rubber banded together in the first picture. Now the extra tiles live in my desk drawer, and the calendar looks much better for it.

This was a fun little project, since it actually took less time than than I thought it might. I finished the whole thing in about four days, which was dramatically better than the colored crate shelving I'd just finished the week before that took over a month to complete. One more project checked off my list, and one step closer to finishing the school room!

Saturday, January 18, 2014

Color in the School Room


For the last few months, one of my biggest house projects has been the school room. Our house is a cross-gable with a very straightforward layout: living room in the front, dining room and school room in the middle, and kitchen in the back. So the school room (or back parlor, downstairs bedroom, and playroom as I'm sure it's been over the course of its long life) is very central in the house. But when we moved in, it was a dumping ground for unpacked boxes and unfinished projects. I had a vision for what I wanted it to become, but it was going to take a lot of work and a lot of paint before we got there.

Before I show you the school room, a quick note about color. I love color. Really, really love color. Working with and looking at color is one of the main reasons I knit, spin, weave, and sew, even more than the final product or the process of creating. And color is one of the three main ways (along with reading seed catalogs and looking at green plants) that I intentionally fight off the winter blues. Since the school room was going to be one of the most colorful rooms in the house, I picked it for my big project this winter.


This is a snapshot of my schoolroom pinboard. I knew I wanted a lot of color, antique school desks and a real antique slate chalkboard. But what I started with was a lot of brown.


I don't have any good before pictures to show you of the school room, except this one that we took on our first showing of the house last March. The previous owners weren't doing very much with the room besides keeping some of their kids toys out of the general path of the house. The window in this picture is the only one in the room, so it's the darkest room in the house.

The first thing we did was paint (and when I say we, I really mean my very kind mother-in-law who came up for a few days  before we moved and painted two rooms for us) the room a very light salmon. The previous color was more of a light yellow/tan, and was not a bad color except it added to the overall brown of the room. Brown floor, brown trim, yellow curtains, yellow walls, tan ceiling. My vision was bright, warm, and colorful, so I picked out a color called "pink sangria." I had lots of second and third thoughts about the color, but now that I'm starting to get the furniture and accessories the way I envisioned, I love it. It's light enough to be almost a neutral, but warmer and more interesting than the rental white we'd been living in for five years.


This picture shows (a) the room color most accurately of all the photos in this post, (b) the beautiful (and heavy!) antique slate chalkboard I bought from a lovely woman on Craigslist, and (c) our main project this week: potty training Laurel. Who has recently started asking us to call her Laurie. She's my hilariously funny girl, and a delight to have in the house.


Here is my desk and work corner of the school room. There are so many things I love about this area! I love the enamel topped farm table that has a new life as my desk. It works so well for all the sewing, cutting, designing, laying out, and painting that I do.

I also love the girls' table top chalkboard/whiteboard/drawing paper easel finally has a home hanging up from the crate shelves. It's a great toy for them to play with, but it takes up a lot of space and looks messy when it's just floating around the room. Now it's easy to get down and put back up again, and adds rather than detracts to the beauty of the room.


We just hung the crate shelving up this week, and I really like too. Which is a good thing, since it took forever to paint them all. The rough cut wood just ate up paint. It took nearly half a gallon of white paint just to prime them, and three to four 2-ounce bottles of acrylic paint to color each of them. Spray paint might have been a better option, but it's too cold to spray paint in the winter and I wanted the large color selection I had with Americana paint. But I am glad to have it done!


This blue pegboard holds my sewing thread an miscellaneous tools and supplies. It's another thing I love, both for the rainbow of color it brings to the room, and because it belonged to Collin's great-grandmother Jennie. Even some of the thread up there was hers. I love being able to carry on the tradition of creating beauty from her.


My gumball machine filled with wool felted bouncy balls doesn't have any purpose other than to bring more color and cheer into the room. It's still looking for a final home, but I do like it next to my desk.


Last, but not least, is this nice big bulletin board. It used to be in my mom's school room, but she recently downsized to a smaller cork board, so my sister Kristen gave it a makeover and gave it to me for Christmas. Before it was a medium brown frame with 70s goldenrod burlap, so she painted it green and covered it in cream burlap. It looks great! Right now we have it covered with our leaf identification cards, but there are so many other things I look forward to doing with it.

That's almost it for finished projects, except a small-ish one that I'm especially happy about and will post in a couple days. I'd say the room is about half finished right now. We still have a long list of projects, including

  • Paint the school supply hutch (blue and white)
  • Paint the file cabinets (light blue or turquoise)
  • Make a yellow ruler growth chart
  • Make vintage handkerchief curtains
  • Refinish the wood on some of, and paint the rusty metal on all of the antique school desks
  • Mount large maps to canvas and hang them on the wall

So there's plenty to keep us busy for a long time. But now that we're starting to get somewhere, I'm extremely happy. It's becoming a really nice place to hang out, to sing songs, to color, and to create. In fact, as I write this right now Annie is yelling to me from the school room saying, "Mama, I want to sing songs!" So I think I'd better head that way, and set up a cd for her. See you next time, when I'll show you our cute perpetual calendar makeover!

Friday, September 20, 2013

Laurel's Buckle Book


My just-turned-two-year-old Laurel is in love with buckles. She buckles all of her sisters carseats before I can get anyone buckled in the car. Collin and I are always finding our belts and backpacks and bags and baby carriers thoughtfully buckled for us when we go to put them on. So with all this buckling, I thought what Laurel needed for her birthday more than anything else was a book full of buckles that she could simply fasten and unfasten to her hearts content.


This August Collin had a conference up near his parent's house, so we all went up and had a nice visit with his family. I had a lot of free time, with Grandma to help with the girls and Collin away at the conference, so I brought my sewing machine and did most of the work on Laurel's quiet book up there. It was the perfect way to accomplish a big project like this undistracted by all the housekeeping and moving projects that keep me busy at home.

Dog with collar and leash. Inspired by D is for Dog on A Back to Basics Lifestyle

The first page is Laurel's favorite. It has a dog collar to buckle, and a leash to clip on. These straps are some of my handwoven inkle bands that are left over from other projects. I knew as soon as I came up with the buckle book idea that I wanted to use as many of my handwoven band scraps as possible, and I totally love the colorful textural pop it gives the pages.


Generally Annie will unbuckle the pages for Laurel, and Laurel puts them back together. It keeps both girls busy and happily playing together... double win!


The leash clip is hard for Laurel's 2-year-old hands to manage, but Annie can do it with two hands. A plastic one probably would have been better, but this was the best Collin could find at a local hardware store.

Overall bib, inspired by the heavily pinned "Close your Clothes" quiet book by Forty-Two Roads

Sewing in an overall bib was one of the first ideas I came across once I knew I wanted to make Laurel a buckle book. I found these overalls in the children's clearance bin at Goodwill. I don't think I would have dressed my girls in them, but the flowery, heart-buckley girliness is just perfect for this page.


Laurel couldn't figure out how the buckles worked for the first few days she was playing with this book, but now she's doing it on her own confidently. This is something I just love to see.


Heart buckles!

Skirt with belt, also inspired by Forty-Two Roads

Each page has an activity on the front and a solid fabric on the back. I did this for a few reasons:
1. I had a limited amount of time to sew the activity pages, and I needed my seven activities to amount to a whole book.
2. Using a plain fabric page helps focus on the particular activity on the page the book is opened to. A moderately fun page won't be overlooked just because it's next to a favorite.
3. The fabrics are pretty, and provide a simple contrast to the busyness of the activity pages.


The skirt buckling page is also made with a handwoven inkle belt scrap. I pulled out a thrifted buckle I saved from another upcycling project, and a belt loop I salvaged from a worn out pair of Collin's pants. The girls want to know where the underwear is under the skirt. I thought about sewing some in, but it didn't quite seem right... although is not having underwear worse? It makes me think of the (grammatically incorrect) Latin joke we used to tell in junior high... "Semper ubi sub ubi!"

Shoe inspired by All The Quiet Things

Every quiet book has to have a shoe tying page, right? This skill is a little beyond my girls right now, and I actually make a point of not buying them any shoes with laces because tying shoes that are always coming on and off would drive me crazy! But I had these beautiful leather scraps in my scrap pile, and the cheerful red grommets. When I found glittery ice skating shoelace in a miscellaneous bucket I knew it would be perfect. Maybe when my girls master tying bunny ears on this page I'll finally let them get some real shoes with laces.


Sewing leather is hard! Even with a special leather needle I still had trouble convincing my sewing machine to sew evenly without skipping lots of stitches. I stitched all the way around the outside and between the main shoe and the sole, but the little details are superglued on. Superglue is really amazing stuff. This project was my first time really using it. I didn't know it got so hot when it was bonding! I almost burned myself a few times.

Life Jacket inspired by Kayla Danielle

A life jacket has lots of buckles! I made this one by cutting two life jacket halves out of cardboard, and then sewing fabric sleeves for them. The straps are actually some more handwoven scraps left over from another project, but since they're solid black they aren't any more interesting than store-bought belts.


This is Laurel's second favorite page. It isn't as cute as the puppy, but it has TWO of her favorite kind of buckles, so that makes it great. Something I didn't foresee being a complication is that she frequently tries to cross or twist the straps when buckling them back together, which adds a layer of complexity in completing the task.


Laurel couldn't even let me photograph this page without swooping in and buckling it back together. That girl is obsessed with buckles!

Rotary phone inspired by How to Make a Quiet Book

I spent more time designing this rotary phone page than any other. I wanted a dial that would really turn, I wanted a real stretchy phone cord, and I wanted it to look as realistic as possible. I made lots of sketches, and scoured Jo-Ann's for just the right materials. Finding a sheet of clear plastic was more difficult than I thought it would be. Finally I found shrink film, which was just what I needed in the un-shrunk version. If I'd cut a large dial and tried to shrink it, the thickness would have been good but it likely would have warped and ended up less circular. The dial stopper (the grey part) was also made of the shrink film, just lightly sanded and colored with a graphite pencil.The button holes were all made with a regular hole punch before shrinking it in the oven - it shrinks up that much! We found the telephone cord at Goodwill, and since I needed such a short segment of it, I might see if I can include some stretchy cord in a book I'm making for Annie now.


The handset attaches to the cradle with snaps, which is the one thing I would change about this page. The snaps are straining the applique stitching on the phone cradle, and they're pretty hard for the girls to manage. If I were to make the page again I would probably use Velcro, or make the cradle have belt loops for the phone to slide into.


I wanted to make the rotary phone look as accurate as possible. I think I was mostly feeling nostalgic, remembering how my grandmother used one of these for years, even when the rest of us were so modern with our enormous cordless land lines. Did you know that all rotary dials reverse the alphabet direction between 5 and 6? It looks kind of funny to go from "GHI" to "LJK," but I guess at that point you're still supposed to be reading more left to right than top to bottom.

Lock and key page, inspired by Testy yet Trying

When I saw the lock and key page that inspired this one, I knew it would be a perfect way to use some of my favorite bright fabrics and scrap and sample inkle bands. I just love the colors here! I was afraid that the girls wouldn't be able to master the key and lock concept, but Annie took right to it. In fact, when she and Laurel were playing with the quiet book today, Annie flipped right to this last page and told Laurel (in her informative, big-sister instructional voice) "This is the FUN page, Laurel!"

So, the question is always: after all that work, does Laurel actually like it?


The answer is yes. Most definitely.


Laurel asks to play with her quiet book every night around bed time, and each time she opens it the first thing she does is to give her puppy a big smacking kiss on the nose. Makes me smile every time.

Stay tuned for the first look at my really big project this year! Annie and I are making en enormously fat ABC quiet book for preschool. We're learning a letter a week, and making a corresponding page in her quiet book. It's looking really cool. As soon as I can find some really fat binder rings I'll take some pictures to show ya'll our progress so far.